In this article
- Why use a home server at all?
- Which Ubuntu version should you install?
- Before you install Ubuntu
- Install Ubuntu Server
- First login and updates
- Set up a basic firewall
- Install Apache
- Install MySQL
- Install PHP
- Create your first local development site
- Make local domain names work
- A better local domain setup
- Install phpMyAdmin? Maybe.
- Set up Git
- Set up cron for scheduled tasks
- Local SSL: do you need it?
- Public SSL with Let’s Encrypt
- Connect a real domain to your home server
- Allow connections from outside your local network
- Set up an Apache site for your domain
- Basic security checklist
- A sensible folder structure
- Backups
- When not to host from home
- The practical setup I’d recommend
- Final takeaway
A home server sounds more serious than it needs to be.
You don’t need a rack, a data centre, or a glowing wall of hardware that looks like it runs a small bank.
For local web development, an old desktop PC, a small mini PC, or a retired laptop can be enough.
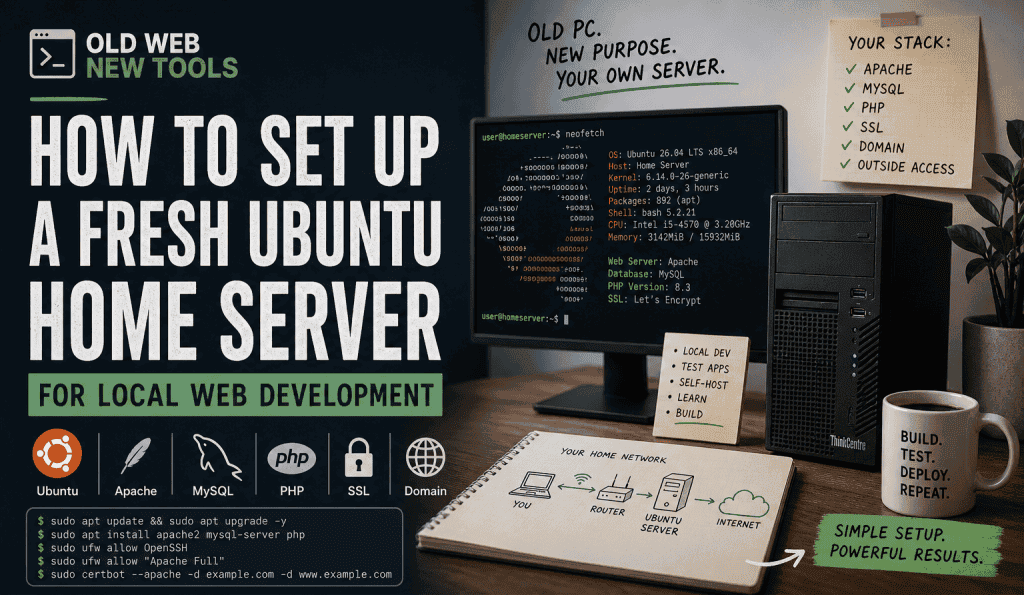
The point is simple: take a spare machine, install Ubuntu Server, add Apache, MySQL, PHP, and a few basic tools, then use it as your own local development box.
It’s a useful setup if you build small web apps, test PHP/MySQL projects, play with self-hosting, or want a real server environment without paying for a VPS every time you want to experiment.
This guide walks through the basic path:
- choosing hardware
- installing Ubuntu Server
- setting up SSH
- installing Apache, MySQL, and PHP
- creating local sites
- setting up SSL
- connecting a domain
- allowing access from outside your network
- avoiding the obvious security mistakes
This is not meant to be an enterprise production server guide.
It’s a practical home lab setup for solo builders.
Boring, useful, and just dangerous enough to teach you something.
Why use a home server at all?
You could use XAMPP, WAMP, Docker, a cloud dev environment, or a cheap VPS.
Those are all valid.
But a home server gives you something slightly different. It lets you work against a real Linux server on your own network. You can test Apache configs, PHP apps, MySQL databases, cron jobs, file permissions, SSL, domains, and deployment habits in a place that feels closer to production than a folder on your laptop.
It’s also a good use for old hardware.
That dusty PC under the desk might be overkill for browsing the web, but it’s probably fine as a local dev server.
Ubuntu Server’s recommended minimums are modest. The official docs list 2 GB RAM and 5 GB disk as recommended minimum requirements for a basic server install.
More is better, obviously, but you don’t need much to start.
A useful starter machine:
| Part | Practical minimum | Better |
|---|---|---|
| CPU | Any 64-bit Intel/AMD CPU | 4+ cores |
| RAM | 2–4 GB | 8–16 GB |
| Storage | 32–64 GB SSD | 250 GB+ SSD |
| Network | Ethernet | Ethernet |
| Power | Reliable enough | Low-power mini PC |
Ethernet is worth using if you can.
Wi-Fi works, but servers are boring things that should stay connected. Boring is good here.
Which Ubuntu version should you install?
For most people, install Ubuntu Server LTS.
LTS means Long Term Support. Ubuntu’s current Server download page lists Ubuntu 26.04 LTS as the latest LTS release, with five years of free security and maintenance updates, and longer coverage available through Ubuntu Pro.
That gives you two sensible choices:
Ubuntu Server 26.04 LTS
Use this if you’re starting fresh and want the current LTS release.
Ubuntu Server 24.04 LTS
Use this if you prefer a more settled ecosystem and don’t need the newest base packages.
For a fresh home server in 2026, I’d usually pick Ubuntu Server 26.04 LTS unless you have a specific reason to stick with 24.04.
For local web development, either LTS version is fine.
The important bit is choosing an LTS release, not chasing every interim version because you enjoy unnecessary tiny fires.
Download it from Ubuntu’s official Server page.
Before you install Ubuntu
You’ll need:
- the old PC or mini PC
- a USB stick, usually 8 GB or larger
- the Ubuntu Server ISO
- a tool to write the ISO to USB, such as Rufus, balenaEtcher, or Raspberry Pi Imager
- an Ethernet cable
- a keyboard and monitor for the install
Back up anything important on the machine first.
Installing Ubuntu Server will usually wipe the drive.
Also, check the machine’s BIOS or UEFI settings. You may need to enable USB boot, disable Secure Boot if it causes issues, and set the USB stick as the first boot device.
This is the bit where old PCs sometimes remind you they have opinions.
Install Ubuntu Server
The Ubuntu Server installer is fairly straightforward.
Canonical’s official install flow covers the usual steps: boot from install media, choose language and keyboard layout, configure networking, configure storage, create a profile, install software, and reboot.
The practical version:
- Boot from the USB stick.
- Choose your language and keyboard.
- Use the normal Ubuntu Server install.
- Configure networking.
- Use the full disk unless you have a reason not to.
- Create your main user account.
- Enable OpenSSH during install if offered.
- Skip extra snaps unless you know you need them.
- Reboot and remove the USB stick.
During networking, try to give the server a stable local IP.
You can do this in two ways.
Option 1: Static IP on the server
Set a fixed IP during install, such as:
192.168.1.50Option 2: DHCP reservation on your router
Let the router assign the same IP to the server every time.
I prefer the router reservation. It keeps network management in one place, and you don’t accidentally create IP conflicts later.
For a small home lab, that’s usually the cleaner option.
First login and updates
After rebooting, log in directly or SSH into the server from another machine.
From your laptop or desktop:
ssh yourusername@192.168.1.50Replace the IP with your server’s local IP.
If SSH was not installed during setup, install it from the server:
sudo apt update
sudo apt install openssh-server
Ubuntu’s OpenSSH server docs still use openssh-server as the package for installing the SSH server.
Now update the system:
sudo apt update
sudo apt upgrade -y
sudo reboot
After the reboot, reconnect with SSH.
Congratulations. You now have a very plain little Linux box on your network.
This is more exciting than it sounds, but only slightly.
Set up a basic firewall
Ubuntu commonly uses UFW, short for Uncomplicated Firewall.
UFW is designed to make firewall rule management easier, which is good because raw firewall rules are not where most of us want to spend a Saturday.
Allow SSH first, or you may lock yourself out:
sudo ufw allow OpenSSH
sudo ufw enable
sudo ufw status
Later, once Apache is installed, you’ll allow web traffic too.
Do not skip the “allow SSH first” part.
Locking yourself out of a server is traditional, but you don’t need to observe every tradition.
Install Apache
Apache is still a perfectly good choice for a home web development server.
It’s not trendy.
That’s fine.
Not everything needs to be trendy.
Install it:
sudo apt install apache2 -yEnable and start it:
sudo systemctl enable apache2
sudo systemctl start apache2
Allow Apache through the firewall:
sudo ufw allow "Apache Full"
sudo ufw status
The Apache Full profile is commonly used to allow both HTTP and HTTPS traffic for Apache.
Test it from another device on your network:
http://192.168.1.50You should see the default Apache page.
That page is not exciting.
That’s good. Exciting server setup usually means something is broken.
Install MySQL
Install MySQL Server:
sudo apt install mysql-server -yStart and enable it:
sudo systemctl enable mysql
sudo systemctl start mysql
Run the security helper:
sudo mysql_secure_installationUbuntu’s server docs describe MySQL as a robust SQL database server and provide official guidance for installing and configuring it on Ubuntu.
For a local development server, you don’t need to go overboard, but you should still remove test users, set sensible passwords, and avoid exposing MySQL directly to the internet.
Log into MySQL:
sudo mysqlCreate a database and user for a test project:
CREATE DATABASE devsite;
CREATE USER 'devuser'@'localhost' IDENTIFIED BY 'replace_with_a_good_password';
GRANT ALL PRIVILEGES ON devsite.* TO 'devuser'@'localhost';
FLUSH PRIVILEGES;
EXIT;
For most PHP web apps on the same server, 'localhost' is what you want.
Do not make MySQL publicly reachable unless you have a very specific reason and know how to secure it properly.
Most people do not have that reason.
Most people just have a future incident report.
Install PHP
Install PHP and the common Apache/MySQL pieces:
sudo apt install php libapache2-mod-php php-mysql php-cli php-curl php-zip php-mbstring php-xml php-gd -yRestart Apache:
sudo systemctl restart apache2Ubuntu’s PHP documentation covers installing PHP with Apache and MySQL for dynamic web applications.
Test PHP:
echo "<?php phpinfo(); ?>" | sudo tee /var/www/html/info.phpOpen:
http://192.168.1.50/info.phpIf you see the PHP info page, PHP is working.
Then delete it:
sudo rm /var/www/html/info.phpLeaving phpinfo() pages lying around is one of those small “I’ll clean that up later” habits that becomes a bad habit.
Clean it up now. Future-you is unreliable.
Create your first local development site
Apache serves the default site from:
/var/www/htmlFor real work, create separate folders per project:
sudo mkdir -p /var/www/devsite/public
sudo chown -R $USER:www-data /var/www/devsite
sudo chmod -R 775 /var/www/devsite
Create a simple PHP file:
nano /var/www/devsite/public/index.phpAdd:
<?php
echo "Hello from my Ubuntu home server.";
Now create an Apache virtual host:
sudo nano /etc/apache2/sites-available/devsite.confAdd:
<VirtualHost *:80>
    ServerName devsite.local
    ServerAdmin webmaster@localhost
    DocumentRoot /var/www/devsite/public

    <Directory /var/www/devsite/public>
        AllowOverride All
        Require all granted
    </Directory>

    ErrorLog ${APACHE_LOG_DIR}/devsite_error.log
    CustomLog ${APACHE_LOG_DIR}/devsite_access.log combined
</VirtualHost>
Enable it:
sudo a2ensite devsite.conf
sudo a2enmod rewrite
sudo systemctl reload apache2
Apache virtual hosts let one server serve different sites depending on the requested hostname.
This is one of those boring features that becomes very useful once you have more than one project.
Make local domain names work
Your laptop does not automatically know what devsite.local means.
For simple local testing, edit your computer’s hosts file.
On macOS or Linux:
sudo nano /etc/hostsOn Windows, edit this file as Administrator:
C:\Windows\System32\drivers\etc\hostsAdd:
192.168.1.50 devsite.localNow visit:
http://devsite.localThis is enough for local development.
For multiple projects, add more virtual hosts:
project1.local
project2.local
client-test.local
Point them all to the same server IP and let Apache route them by ServerName.
Simple, slightly manual, and good enough for a lot of setups.
A better local domain setup
Editing hosts files works, but it gets annoying if you have several devices.
A better home lab setup is local DNS.
Depending on your router, you may be able to add local DNS records there. Another option is running Pi-hole or AdGuard Home and using it as your local DNS resolver.
Then you can create names like:
server.home
devsite.home
phpmyadmin.home
For purely local development, this is cleaner than buying a domain.
It also means you don’t have to edit every laptop, desktop, tablet, and experimental machine you’ve somehow accumulated because “it might be useful later”.
Install phpMyAdmin? Maybe.
phpMyAdmin is useful, especially for quick database inspection.
It is also something you should not casually expose to the public internet.
Install it only if you actually want it:
sudo apt install phpmyadmin -yDuring setup, choose Apache if prompted.
A safer alternative is to use a desktop database client from your main computer and connect over SSH, or just use the MySQL CLI on the server.
For a local-only dev machine, phpMyAdmin is fine.
For a public-facing server, be more careful.
“Works in the browser” is not the same as “should be exposed to every bot on earth”.
Set up Git
Install Git:
sudo apt install git -ySet your identity:
git config --global user.name "Your Name"
git config --global user.email "you@example.com"
For local dev, Git matters because it gives you a recovery point before you let yourself, or an AI coding assistant, make a mess.
A boring workflow:
cd /var/www/devsite
git init
git add .
git commit -m "Initial devsite setup"
Small commits beat heroic debugging sessions.
I realise this is deeply unfair to our natural urge to change twelve things at once and hope for the best.
Still true.
Set up cron for scheduled tasks
A lot of useful web apps eventually need scheduled jobs.
Cron is still good for this.
Edit your crontab:
crontab -eExample: run a PHP script every 15 minutes:
*/15 * * * * /usr/bin/php /var/www/devsite/scripts/task.php >> /var/log/devsite-task.log 2>&1This is where a home server starts feeling useful.
You can test background jobs, data imports, cleanup scripts, and boring automation without faking it in your editor.
A lot of useful web tools are basically:
get data
process data
store data
show useful result
repeat
Cron is not glamorous.
Cron gets things done.
Local SSL: do you need it?
For local development, SSL is optional until it isn’t.
You may need HTTPS locally if you are testing:
- secure cookies
- OAuth redirects
- payment provider callbacks
- browser APIs that require secure contexts
- service workers
- production-like login flows
For local-only SSL, you can use self-signed certificates or a tool like mkcert.
Self-signed certificates work, but browsers complain unless you trust the local certificate authority. That’s fine for your own machine, less fine when testing across several devices.
For most basic PHP/MySQL local development, start with HTTP.
Add local HTTPS when the project actually needs it.
That way you avoid turning day one into certificate admin cosplay.
Public SSL with Let’s Encrypt
If you connect a real domain to your home server, use Let’s Encrypt.
Let’s Encrypt is a free, automated certificate authority, and Certbot is the common tool used to obtain and install certificates.
Certbot’s official Ubuntu instructions currently use the snap install method.
Install Certbot:
sudo snap install --classic certbotMake sure the certbot command is available.
Certbot’s docs currently suggest:
sudo ln -s /snap/bin/certbot /usr/local/bin/certbotThen run Certbot for Apache:
sudo certbot --apacheCertbot’s Apache flow can obtain a certificate and edit your Apache configuration automatically to enable HTTPS.
For the normal HTTP-01 validation method, Let’s Encrypt needs inbound port 80 available. Let’s Encrypt’s docs state that the HTTP-01 challenge can only be done on port 80.
That means before running Certbot for a public domain, you need:
- domain DNS pointing to your public IP
- port 80 forwarded to the server
- port 443 forwarded to the server
- Apache responding for that domain
- firewall allowing HTTP and HTTPS
Don’t start with SSL if plain HTTP doesn’t work yet.
That way lies a very specific kind of sadness.
Connect a real domain to your home server
To connect a domain, you need to point DNS to your home internet connection.
The usual setup is:
example.com      A      your.public.ip.address
www.example.com  CNAME  example.com
An A record maps a domain name to an IPv4 address, which lets browsers connect without people typing the raw IP address.
If you use Cloudflare, DNS records are managed from the DNS Records area, and Cloudflare’s docs describe DNS records as the information used to make websites and applications available to visitors and other web services.
The catch is that many home connections have a dynamic public IP.
That means your IP can change.
You have a few options.
Option 1: Static IP from your ISP
Best, but often costs extra.
Option 2: Dynamic DNS
Use a dynamic DNS provider or a script that updates your DNS record when your IP changes.
Option 3: Cloudflare Tunnel
Useful if you don’t have a clean public IP or don’t want to open inbound ports.
Cloudflare says Tunnel can connect resources to Cloudflare without a publicly routable IP, using outbound-only connections from cloudflared to Cloudflare’s network.
Option 4: Tailscale Funnel
Useful for sharing a local service publicly through Tailscale.
Tailscale describes Funnel as routing traffic from the broader internet to a local service running on a device in your Tailscale network.
For a normal website on your own domain, DNS plus port forwarding is the classic route.
For development previews, tunnels can be less painful.
Allow connections from outside your local network
This is the part where you should slow down.
Local servers are forgiving.
Public servers are not.
To make your site reachable from outside your home network, you usually need to configure port forwarding on your router.
Forward:
External port 80  ->  server IP 192.168.1.50 port 80
External port 443 ->  server IP 192.168.1.50 port 443
Do not forward MySQL port 3306 to the internet.
Do not forward random admin panels unless you really know what you’re doing.
Do not expose phpMyAdmin casually.
On the Ubuntu server, allow Apache traffic:
sudo ufw allow "Apache Full"
sudo ufw status
If you need SSH from outside your network, be careful.
A safer pattern is to use Tailscale for private remote access instead of opening SSH to the world.
For SSH hardening:
sudo nano /etc/ssh/sshd_configConsider:
PasswordAuthentication no
PermitRootLogin no
Only do this after you’ve set up SSH keys and confirmed you can log in.
Otherwise, you can lock yourself out.
Ask me how every server admin learns this lesson. Actually, don’t. You already know.
Restart SSH:
sudo systemctl restart sshSet up an Apache site for your domain
Create the project folder:
sudo mkdir -p /var/www/example.com/public
sudo chown -R $USER:www-data /var/www/example.com
sudo chmod -R 775 /var/www/example.com
Create a test page:
nano /var/www/example.com/public/index.phpAdd:
<?php
echo "example.com is running from my home server.";
Create the Apache config:
sudo nano /etc/apache2/sites-available/example.com.confAdd:
<VirtualHost *:80>
    ServerName example.com
    ServerAlias www.example.com
    ServerAdmin webmaster@example.com
    DocumentRoot /var/www/example.com/public

    <Directory /var/www/example.com/public>
        AllowOverride All
        Require all granted
    </Directory>

    ErrorLog ${APACHE_LOG_DIR}/example.com_error.log
    CustomLog ${APACHE_LOG_DIR}/example.com_access.log combined
</VirtualHost>
Enable it:
sudo a2ensite example.com.conf
sudo apache2ctl configtest
sudo systemctl reload apache2
Once DNS points to your server and ports are forwarded, run:
sudo certbot --apache -d example.com -d www.example.comCertbot should configure HTTPS and redirects for you.
If it fails, don’t panic-click everything.
Check plain HTTP first.
Basic security checklist
For a home dev server, don’t pretend it’s Fort Knox.
But don’t leave the front door open either.
Keep the system updated:
sudo apt update
sudo apt upgrade
Enable automatic security updates:
sudo apt install unattended-upgrades -y
sudo dpkg-reconfigure unattended-upgrades
Check firewall status:
sudo ufw status verboseOnly expose what you need:
| Port | Service | Public? |
|---|---|---|
| 22/tcp | SSH | Prefer local or VPN only |
| 80/tcp | HTTP | Public only if needed |
| 443/tcp | HTTPS | Public only if needed |
| 3306/tcp | MySQL | Local only |
Use strong passwords.
Use SSH keys.
Keep public apps separated into their own folders and databases.
Don’t run everything as root.
Don’t make /var/www globally writable.
Don’t expose unfinished experiments unless you’re happy for strangers and bots to find them.
Because they will.
Bots are punctual like that.
A sensible folder structure
For a few small sites, this works:
/var/www/
  example.com/
    public/
    app/
    logs/
    scripts/
  devsite/
    public/
    app/
    logs/
    scripts/
Point Apache at the public folder, not the whole project.
That way config files, .env files, scripts, and private app code are not directly web-accessible.
Example:
DocumentRoot /var/www/example.com/publicNot:
DocumentRoot /var/www/example.comSmall detail.
Big difference.
This is one of those boring habits that saves you from doing something impressively regrettable later.
Backups
A home server without backups is just a slow way to lose files.
At minimum, back up:
/var/www- MySQL databases
- Apache site configs
- important cron jobs
.envfiles, stored securely- SSH keys and deployment notes
Dump a database:
mysqldump -u devuser -p devsite > devsite.sqlBack up web files:
tar -czf devsite-files.tar.gz /var/www/devsiteA simple backup script copied to another machine is better than a perfect backup plan you never set up.
That is unfortunately how most useful admin advice works.
Unsexy and correct.
When not to host from home
A home server is great for learning, local development, private tools, and low-stakes projects.
It may not be the right place for:
- client production websites
- anything with sensitive user data
- high-traffic sites
- e-commerce
- uptime-sensitive projects
- anything you don’t want tied to your home IP
- anything that needs professional monitoring
For those, use a VPS or managed hosting.
The home server is the workshop.
Not necessarily the shopfront.
That distinction matters.
The practical setup I’d recommend
For a simple, useful home web development server, I’d use:
- old mini PC or desktop
- Ubuntu Server 26.04 LTS
- wired Ethernet
- router DHCP reservation
- OpenSSH
- UFW enabled
- Apache
- MySQL
- PHP
- one folder per project
- Apache virtual hosts
- local DNS or hosts file entries
- Git for each project
- no public access by default
- Cloudflare Tunnel or Tailscale for temporary sharing
- public DNS and port forwarding only when actually needed
That gives you a proper little web lab without turning your house into a sysadmin side quest.
Well, not too much of one.
A little side quest is allowed.
Final takeaway
A fresh Ubuntu home server is one of the most useful boring projects you can build.
It teaches you how web apps really run: files, permissions, databases, virtual hosts, DNS, SSL, firewalls, logs, and all the unglamorous pieces that sit between “it works on my laptop” and “it works on a server.”
You don’t need expensive hardware.
You don’t need a fashionable stack.
You don’t need to make it perfect.
Start with an old PC, install Ubuntu Server LTS, get Apache/MySQL/PHP working locally, then add domains, SSL, and outside access only when you actually need them.
Build small.
Test locally.
Expose carefully.
That’s the whole thing.